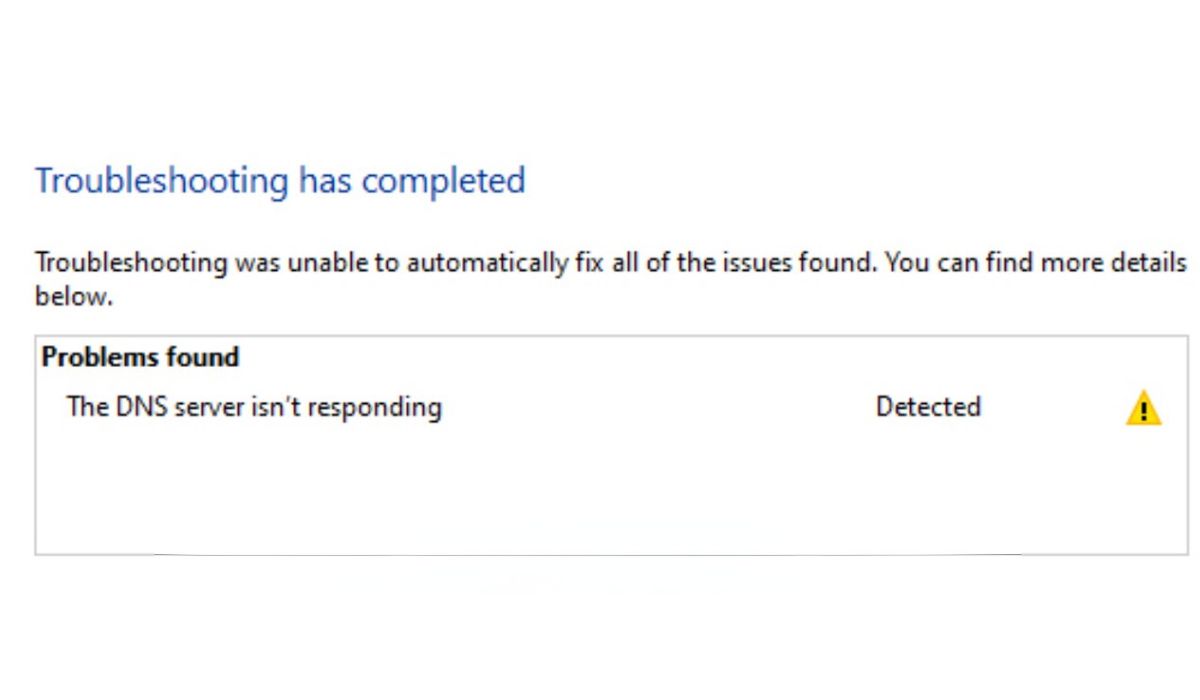
A “DNS server not responding” error can prevent your computer from accessing websites, even when your internet connection appears active. This issue occurs when your system cannot resolve domain names into IP addresses due to DNS failures, incorrect settings, or network conflicts.
This guide will explain why DNS issues occur on Windows and macOS and provide step-by-step solutions to restore internet access.
What Does “DNS Server Not Responding” Mean?

The Domain Name System (DNS) translates website names into numerical IP addresses. If the DNS server fails or becomes unresponsive, your browser cannot load websites.
Common error messages include:
- “DNS server not responding.”
- “This site can’t be reached – DNS_PROBE_FINISHED_NXDOMAIN.”
- “The DNS address could not be found.”
These errors indicate that your system cannot reach a working DNS server, preventing it from connecting to websites.
Common Causes of DNS Server Not Responding on Windows/macOS
- ISP-related DNS failures – The internet provider’s DNS servers may be temporarily down.
- Corrupt DNS cache – Stored DNS records may be outdated or incorrect.
- Router or network misconfigurations – Incorrect settings may prevent DNS resolution.
- Firewall or antivirus blocking DNS traffic – Security software may interfere with network requests.
- VPN or proxy conflicts – These services sometimes override DNS settings, causing failures.
How to Fix “DNS Server Not Responding” on Windows and macOS
If you’re experiencing DNS errors, try these solutions one by one. Some require simple restarts, while others involve adjusting network settings.
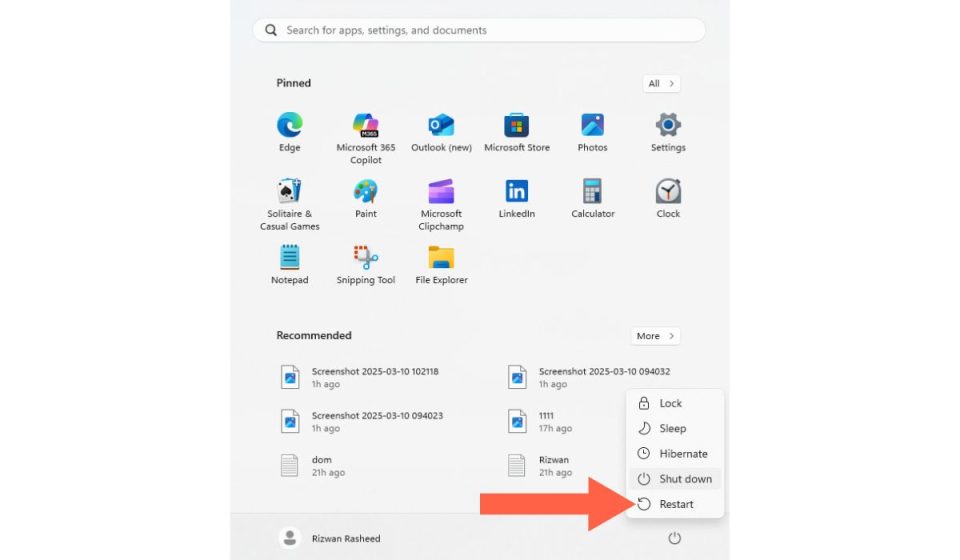
1. Restart Your Router & Computer

Before changing any settings, restart both your router and computer.
- Please turn off your router and modem, unplug them from power, and wait 30 seconds.
- Plug them back in, turn them on, and let them fully reboot.
- Restart your computer and try reconnecting to the internet.
This step clears temporary network glitches and may resolve the issue without further troubleshooting.
2. Change DNS to Google DNS or Cloudflare DNS
If your ISP’s DNS servers are slow or unresponsive, switching to Google DNS (8.8.8.8) or Cloudflare DNS (1.1.1.1) can restore access.
On Windows:
- Open Control Panel > Network and Internet > Network Connections.
- Right-click your active network (Wi-Fi or Ethernet) and select Properties.
- Click Internet Protocol Version 4 (TCP/IPv4) and select Properties.
- Choose Use the following DNS server addresses and enter:
- Preferred DNS:
8.8.8.8(Google) or1.1.1.1(Cloudflare). - Alternate DNS:
8.8.4.4(Google) or1.0.0.1(Cloudflare).
- Preferred DNS:
- Click OK, restart your network connection, and check if the problem is resolved.
On macOS:
- Open System Preferences > Network.
- Select your active network (Wi-Fi or Ethernet) and click Advanced.
- Go to the DNS tab, click +, and enter:
- Google DNS:
8.8.8.8, 8.8.4.4 - Cloudflare DNS:
1.1.1.1, 1.0.0.1
- Google DNS:
- Click Apply, then restart your internet connection.
3. Flush DNS Cache & Reset IP Address
Clearing outdated DNS records may fix connectivity issues.
On Windows:
- Open Command Prompt as Administrator (
Win + R, typecmd, press Enter). - Run these commands one by one:ipconfig /flushdns
ipconfig /release
ipconfig /renew - Restart your computer and check your connection.
On macOS:
- Open Terminal from Applications > Utilities.
- Type and run:sudo killall -HUP mDNSResponder
- Restart your Mac and try reaccessing websites.
4. Disable Firewall or Antivirus Temporarily

Sometimes, security software blocks DNS requests, causing internet failures. Temporarily disable your firewall or antivirus and test your connection.
On Windows:
- Open Control Panel > System and Security > Windows Defender Firewall.
- Click Turn Windows Defender Firewall on or off.
- Select Turn off Windows Firewall (not recommended) under both Private and Public networks.
- Save changes and check if DNS errors persist.
On macOS:
- Go to System Preferences > Security & Privacy > Firewall.
- Click Turn Off Firewall and enter your Mac password if prompted.
- Test your internet connection.
If the issue is resolved, add an exception in your firewall/antivirus instead of keeping it disabled.
5. Reset Network Settings
If other solutions fail, resetting network settings can restore DNS functionality.
On Windows:
- Open Command Prompt as Administrator.
- Type the following command and press Enter: netsh int ip reset
- Restart your computer and reconnect to your network.
On macOS:
- Open System Preferences > Network.
- Select your active network, click Advanced > TCP/IP, and Renew DHCP Lease.
- Restart your Mac and check if the issue is resolved.
6. Update Network Drivers & Router Firmware
Outdated network drivers or router firmware may cause DNS failures.
On Windows:
- Open Device Manager (
Win + X > Device Manager). - Expand Network Adapters, right-click your network adapter, and select Update Driver.
- Restart your PC and check if the problem persists.
On macOS:
- Open System Preferences > Software Update.
- If a macOS update is available, install it, as updates often include network fixes.
For Routers:
- Log into your router’s admin panel (
192.168.1.1or192.168.0.1). - Go to the Firmware Update section and check for updates.
- If an update is available, apply it and restart the router.
Updating drivers and firmware prevents compatibility issues with DNS servers.
7. Contact Your ISP if DNS Issues Persist
If none of the above solutions work, your internet provider’s DNS servers may be down.
- Call your ISP’s customer support and ask about a DNS outage.
- Test your connection using a mobile hotspot or a different Wi-Fi network.
- If your ISP confirms DNS issues, switch to Google DNS (8.8.8.8) or Cloudflare DNS (1.1.1.1) as a workaround.
If switching DNS servers does not work, your ISP may need to resolve the issue manually.
Preventing Future DNS Issues
To avoid DNS-related problems in the future, follow these best practices:
- Use a reliable DNS provider – Google DNS (
8.8.8.8), Cloudflare (1.1.1.1), or OpenDNS (208.67.222.222). - Restart your router periodically – Refreshing network settings help maintain stability.
- Avoid VPNs with strict DNS filtering – Some VPNs override DNS settings, leading to failures.
- Keep network drivers and router firmware updated – Updates often include bug fixes and security improvements.
By following these steps, you can maintain a stable and responsive DNS connection.
Conclusion
DNS failures disrupt internet access, but they are usually easy to fix by flushing the DNS cache, changing DNS servers, or resetting network configurations.
Updating drivers or contacting your ISP may be necessary if the issue persists.
Have you encountered DNS errors on Windows or macOS? Share your fix in the comments!
