Thinking of building your own PC in 2025? Great choice! It’s easier than you think, and a lot of fun. Whether you’re new or just need a refresher, this step-by-step guide will walk you through it.
Why Build Your Own PC?
- Save money
- Customize performance
- Learn something new
- Upgrade at your pace
Ready to become a tech wizard? Let’s do this. 🧙
Step 1: Pick Your Parts
Before you start building, you need the right parts. Here’s what you’ll need:
- CPU (Processor) – The brain of the system.
- GPU (Graphics Card) – For gaming and video tasks.
- Motherboard – Connects everything.
- RAM (Memory) – Lets your PC multitask.
- Storage – SSDs are fast, HDDs are cheaper.
- Power Supply Unit (PSU) – Feeds power to your parts.
- PC Case – Holds it all together.
- Cooling – Fans or liquid, your choice!
- Operating System – Usually Windows or Linux.
Tip: Use online PC part picker tools to make sure everything is compatible.
Step 2: Prepare Your Workspace
Find a clean, flat surface. Ground yourself to avoid static shocks—nobody wants a fried motherboard!
Lay out all the parts and grab a screwdriver. You’re almost ready.
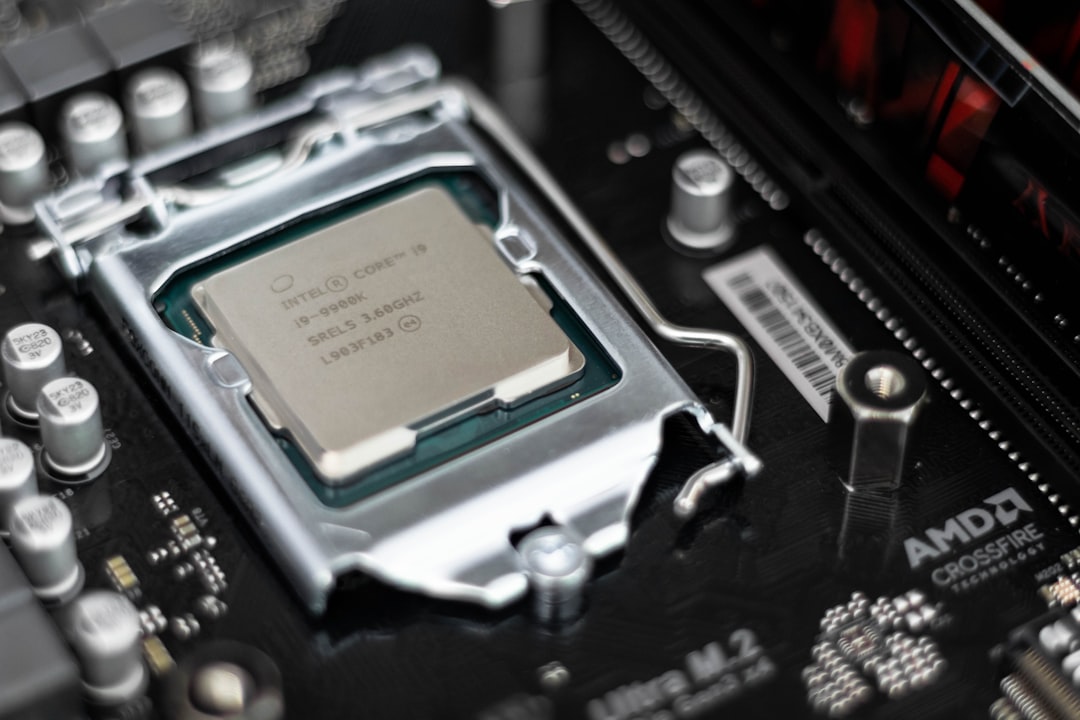
Step 3: Install the CPU
Open the motherboard’s CPU socket. Carefully drop in the CPU—no force needed. Lock it in place using the provided latch.
Apply a tiny drop of thermal paste if it’s not pre-applied on your cooler.
Step 4: Add RAM
Find the RAM slots. Line up the notches and push each stick in until it clicks. You’ll usually hear a satisfying snap!
Step 5: Mount Motherboard Into Case
Screw in the case standoffs, then gently lower the motherboard into the case. Line up the ports with the I/O shield, then screw it in place.
Step 6: Connect PSU
Place the power supply into the case and screw it in. Plug in the 24-pin and 8-pin connectors to the motherboard.
Don’t worry—it only fits one way!
Step 7: Install the Storage
Slide your SSD or HDD into its tray. Connect SATA cables to the motherboard and plug in the power cable from the PSU.
If you have an NVMe SSD, it goes directly into the motherboard. One screw, and done.
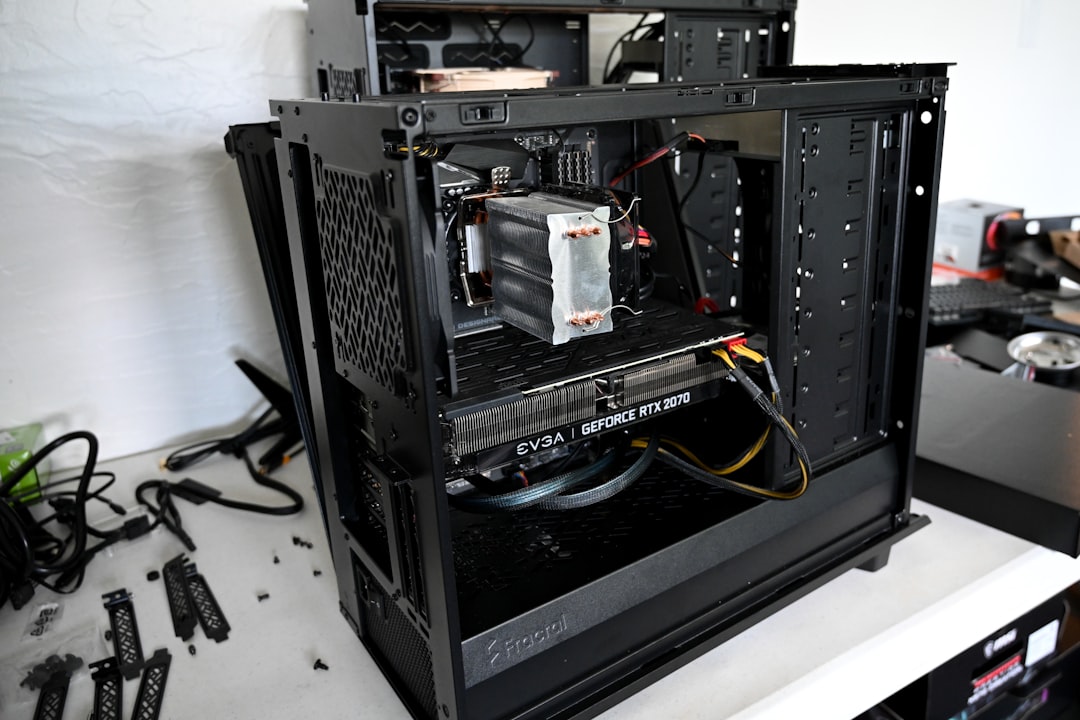
Step 8: Install the GPU
Pop off the correct PCIe slot covers from the case. Line up the GPU with the PCIe slot on the motherboard and push until it clicks.
Secure it with screws and plug in GPU power cables.
Step 9: Hook Up Case Cables
Connect case fans, front panel buttons, audio, and USB ports to the motherboard. This is the trickiest part—take your time.
Your motherboard manual is your best friend here!
Step 10: Boot Time!
Double-check your cables. Plug in the monitor, mouse, and keyboard. Turn on the power and hit the power button…
If all goes well, fans spin, RGBs flash, and a screen appears. Woohoo!
Step 11: Install Your OS
Insert your Windows USB or create a bootable one using a tool like Rufus. Follow the on-screen steps to install your OS.
After installation, download drivers from your motherboard and GPU makers. Then you’re ready to roll!
Helpful Tips
- Watch video tutorials – Seeing it helps.
- Don’t rush – Patience = success.
- Organize cables – Use zip ties for neatness and airflow.
Enjoy Your New Machine!
You just built a PC in 2025. Congrats!
Play games. Stream videos. Edit photos. Whatever you want. You made it with your own hands—and it feels awesome.