Have you ever wondered why menus on a site follow you? You scroll down, and it’s there no matter where you go. Maybe you found it odd in the beginning, but now you are used to it. If you visit a website without a menu that follows you for easy navigation, you probably don’t click on anything else on that site.
That, my folks, is called a sticky menu. It gives any website an uncomplicated look, but it doesn’t slow anything down which is why it’s one of the favorite “hacks” of any web design company. In fact, it helps visitors navigate through your content much more easily. That’s the number one reason almost every website has it. Providing your audience with easy navigation is just a bonus point for you.
The menu usually contains the most important parts of your website. If your visitor is reading an article about, let’s say, digital marketing, and they feel intrigued by it. They will look you up, see the contact information on the sticky menu, and hit it. There is no scrolling up and down and endlessly searching for the email. It’s right there.
There are two ways to achieve that – with and without a plugin.
1. Adding a Sticky Menu By Using Code

Plugins are great – let’s not lie to ourselves. But some people just don’t want to use them, and that’s their right. If a simple line of code can do it, why use a plugin? We will answer this one in the next section – so, keep on reading.
First, you need to enter your dashboard and then go to the Appearance -> Customize and then click Additional CSS.
Then you add this CSS code:
#website-navigation {
background:# ffffff;
height:90px;
z-index:170;
margin:0 auto;
border-bottom:1px solid #fafafs;
width:100%;
position:fixed;
top:0;
left:0;
right:0;
text-align: center; }
Note: you need to replace the #website-navigation with the Id of your navigation menu or with the CSS class. When you enter this that’s it, click publish and you will have your sticky menu. Also, if you want a different background color than the one that we set. Simply change it from our fffff (which is white btw) to any other you like.
Now, you see, you won’t have much control over the sticky menu when using CSS code. That’s why we recommend using a plugin because it allows you to do so much more than just add a simple sticky element.
2. Adding a Sticky Menu With a Plugin
Now, a plugin is always a game-changer. There is a plugin for literally anything, from plugins that will safeguard your website to the ones that will help you with the design. We have one just like that for a sticky menu called – WP Sticky.
By using this little helper, you can stick any element to your website. From the header and the menu to navigation and widgets – anything can be sticky on your WordPress site. The amazing part is that you don’t need to know how to code. Not a single line of code is needed in order to create a sticky element.
The plugin is super fast – you can stick any element in a matter of seconds, and you can do it by simply picking it off the screen. We, of course, covered that in the next section of this article. As the famous fish Dora would say, just keep swimming.
There is both a free and a premium version. And, we all know with the premium, you just get more. The premium version gives you more control over the settings and sticking multiple objects on your site.
Let’s jump right into it.
Step 1 – Dashboard
After you’ve installed it, go to your dashboard and find your new shiny plugin under Settings. This is what the dashboard should look like.
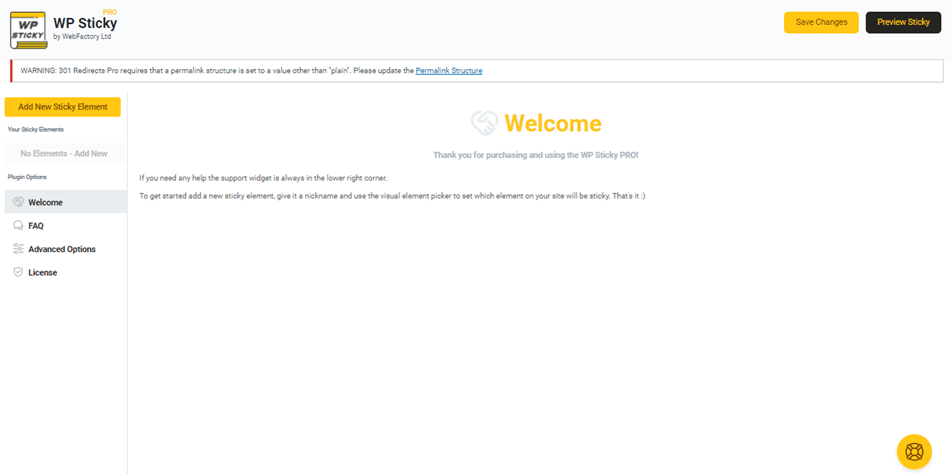
Pretty simple, clean, and easy to use. As you can see, under the Plugin options, you can find the FAQs – where you can see the most common questions and answers, advance options, and license.
The yellow lifesaver that’s in the bottom right corner is there if you have any questions or problems. With that, you can reach out to the support team in no time. They think about their customers and provide them with the greatest experience, just as any support team should.
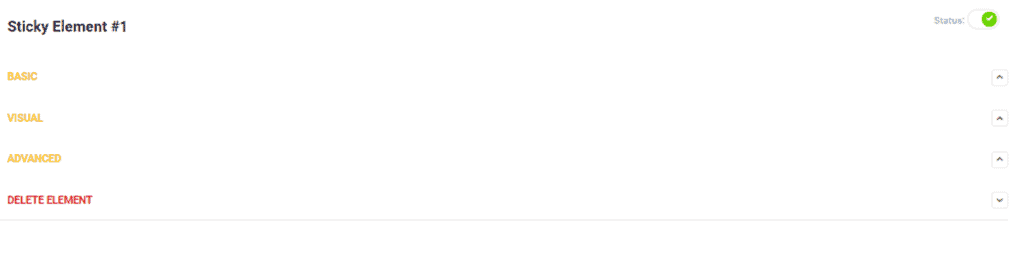
Step 2 – Add a New Element
To add a new sticky element, you simply click the Add New Sticky Element – you can’t miss it. There are three main parts of creating a new element, Basic, Visual, and Advance.
To choose the element you want to be sticky, just click on the Pick Element button.
Step 3 – Basic Settings
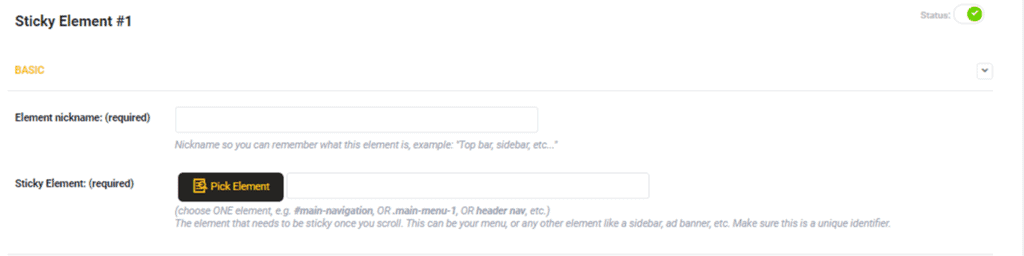
In the basic settings, you have to name your sticker and pick an element. The name can be whatever you decide it to be. Sticker 1 or sticky menu, or just something random, you have complete freedom.
Choosing the element is pretty simple. Click on the Pick the element button, your site will open, and you just need to click on the element you want to make sticky. It’s simple and easy, what else do you need?
Step 4 – The Visual Editor
The visual part is where you have the most freedom and a lot of customization options.
The first part is the position, and you can choose between top and bottom. The next thing is the space between the top of the page and the sticky element. It’s optional and pretty much self-explanatory. If you want to have some free space between the top and the sticky element, then do it. It is all your choice.
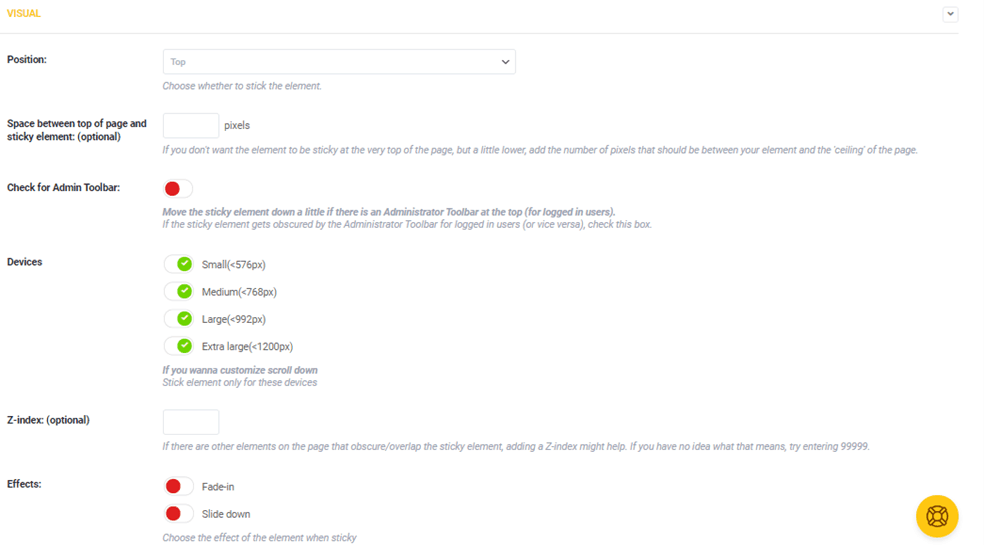
The check for the admin toolbar is no different. Check the box if you have an administration toolbar at the top so that the element you make sticky doesn’t get in the way.
Now onto the devices here. You have 4 options, small, medium, large, and extra-large. This is to prevent large sticky elements from overpowering small screens. The Z index is also optional – it is for any element on the page overlapping with the sticky element. The Z index fixes that. Just type 9999 and see what happens.
Effects are available as well – you can choose the fade-in option or the slide down one. Or both of them, if you are feeling fancy. You can also choose the opacity, scroll range, background color, and even add some custom CSS.
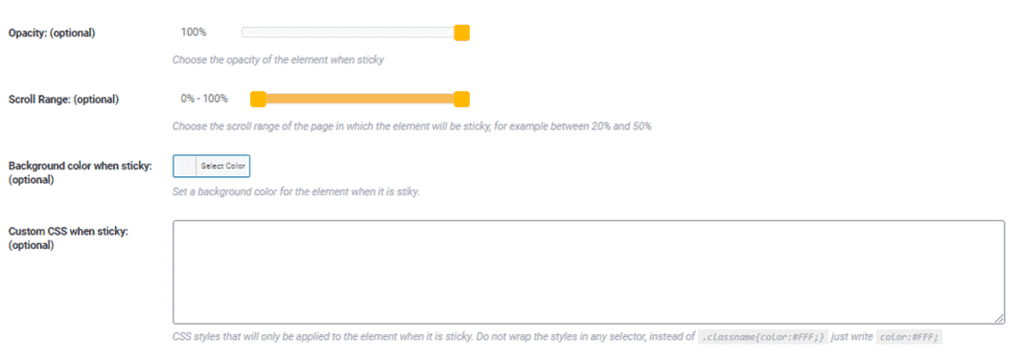
The scroll ran works best between 20% and 50%. But you do you. It is your website. All of the aforementioned options are not obligatory. You can take them or leave them.
Step 5 – Advanced Settings
The Advanced Settings work much in the same way. All of them are optional, and you don’t have to do them if you don’t want to. But let us just briefly go through all of them.
The first option is there to help you disable a sticky element on screen sizes that are too small, so the element won’t be overly distracting. The push-up element is if you want an element to push up your sticky one. You can choose, let’s say footer or a widget.
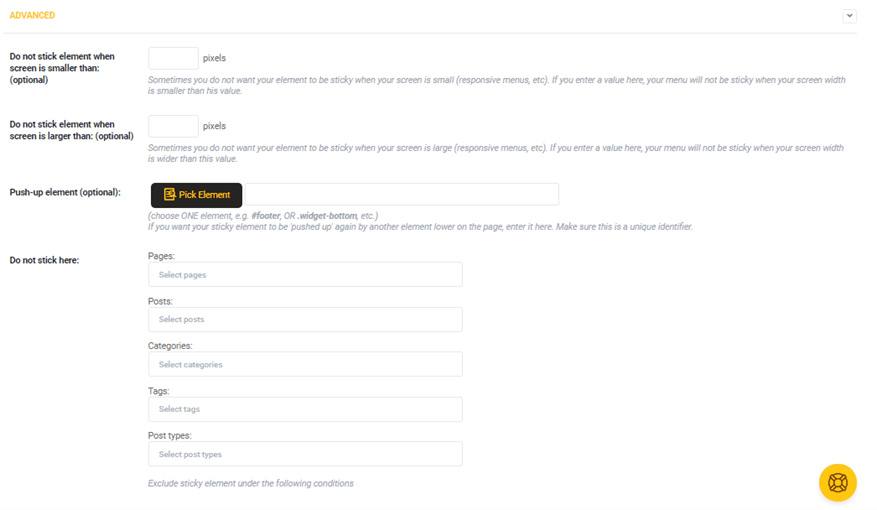
Do not stick here is if you do not want the sticky element to show up on a particular page of yours. Like, you don’t want a funny sticky element to show up on an article that is about something way too serious. You can choose from pages, posts, categories, tags, and post types.
After you checked all of these boxes – just scroll back up and click save changes. And that’s it. Your sticky element is on your site.
Of course, you can just add the name of the sticky element, pick the element of your choice, choose the screen it appears on, and be done with it. Everything else is pretty much optional.
Once again, if you want all of these options, and like having the freedom to make anything sticky, then the premium plan is for you. They are currently offering a 50% launch discount on all of their premium plans. Check them out, and find the best plan for your website.
What Else to Make Sticky?
Since we explained how to stick an element to your site using the amazing WP Sticky, now it is time to see what else you can make sticky. Except for the menu, a good thing to make sticky is the header. The header usually contains your name, logo, and tag line.
Keeping your brand always visible is a good idea, as it makes you more memorable. You can also make widgets sticky. The best choice is probably those that contain the hottest news or your social media icons.
Conclusion
In the end, we must say that every site should have a sticky menu. It will follow visitors even through a long scrolling website and give them the option to go to a different post with a single click.
WP Sticky is the perfect plugin for that. It’s simple, easy to use, and clean. There is nothing worse than scrolling for 30 minutes on an article then having to scroll again for 30 minutes to go back to the menu. Stick the menu on the top – your customers will appreciate it.