Have you ever wondered why a 404 page shows up when you click on a certain link? 404 pages usually show up when that page doesn’t exist anymore for one reason or another. It can be very frustrating to see the same message repeatedly; however, there is a way to optimize 404 pages on your website.
With Elementor, you can customize yours to match the rest of your site and help your audience go back to a working web page. But first, we have to explain why the 404 page is more important for your website than you think.
There are many reasons why the 404 opens up: you clicked on a broken link, you mistyped the URL, the page does not exist anymore because it was deleted, etc. Those pages are usually white with text on the top, and they do not really have any purpose besides informing you there’s nothing there. But as was already mentioned, by customizing it, you can make it fit your aesthetic, put your brand on it, or even try to establish a connection between the audience and your brand by throwing in some relatable humor.
Below, you will find examples of a default and a custom 404 page to see the difference yourself.
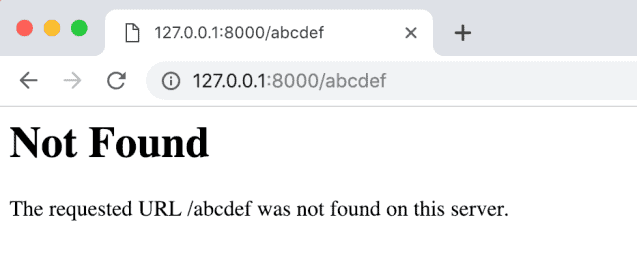
In this image, you can see a default 404 page.
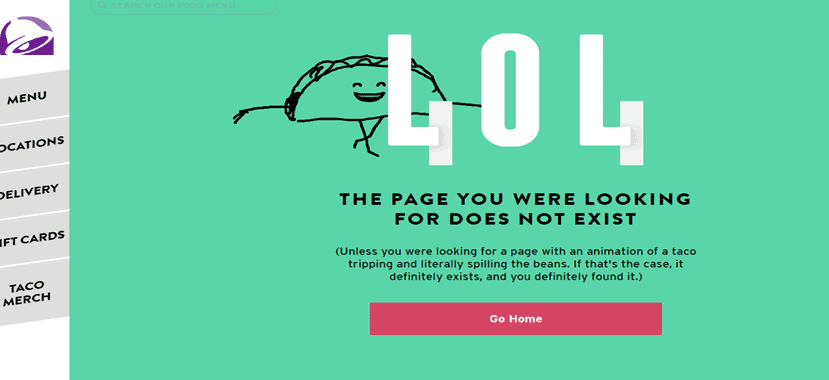
And in this one, a custom 404 page.

As you can see, having a custom 404 page brings you a lot of advantages. Which one of these sites are you more likely to look up again? The one that piqued your interest, perhaps even made you chuckle, is our best guess. In the continuation of this article, we’ll explain how to do the same yourself with Elementor.
How It Works
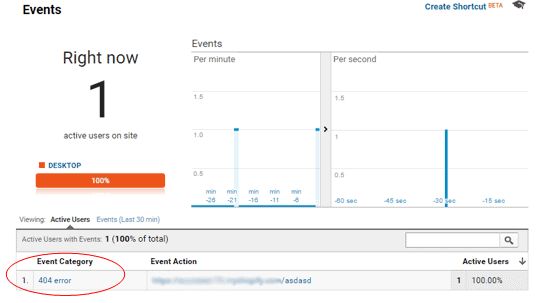
First, if you are using WordPress or Google Analytics, there is an easy way to check how many encounters with 404 pages your audience has when visiting your website. Just open Google Analytics and go to Behavior – Site Content – All Pages. Then, change the Primary Dimension to Page Title and search for „page not found. “ Once you do that, you will see a list of all the broken URLs that trigger the 404 pages.
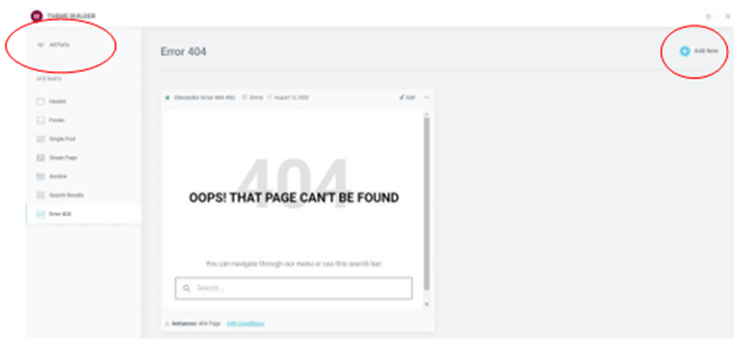
Now, we get to the part of the article that explains how to make a 404 page with Elementor. To open the Theme Builder, you will need to get the Pro version of Elementor. First, you need to go Templates – Theme Builder – Single – Add New. After that, make a new 404 theme by selecting the type of template to be Single, and in the following menu, make it the 404 type. You will see the circled areas in the picture below: the theme builder menu and the Add New button. Be sure not to name the theme „404“ because some troubleshooting with WordPress may occur; that is why you just name it „error page“ or something along those lines.
After that, you can either create a template and a 404 page from scratch or choose a template that Elementor already has in stock and just customize it to your needs and wishes. When it comes to the design and customization, the simple Elementor drag and a drop menu will allow you to create a 404 page that everyone will love.
After you created the page you wanted, you just need to make it public by clicking the publish button. Elementor will automatically recognize this as a 404 website, and it will present you with the option to include this template; once you see this option, just click yes and then save it.
If you want to make your 404 pages more personal, we have your back.
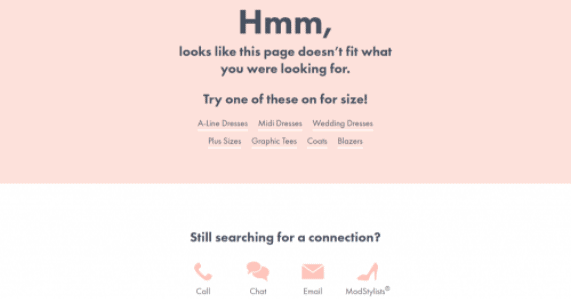
First, you have to understand that people will get frustrated when they get to a 404 page on your website, so you need to take this chance to either promote your brand or lighten the mood with a little bit of humor. You’re going to see a good example of using such techniques for a 404 in a second. The picture below is from a fast-food company, and it’s filled with humor, but it also represents the brand.
Elementor gives you the option to make adjustments to your 404 pages in every way possible. You can add a search bar, links to popular destinations on your website or even a site map, contact information, basically anything that can be even the slightest bit useful to your audience when they land on this page.
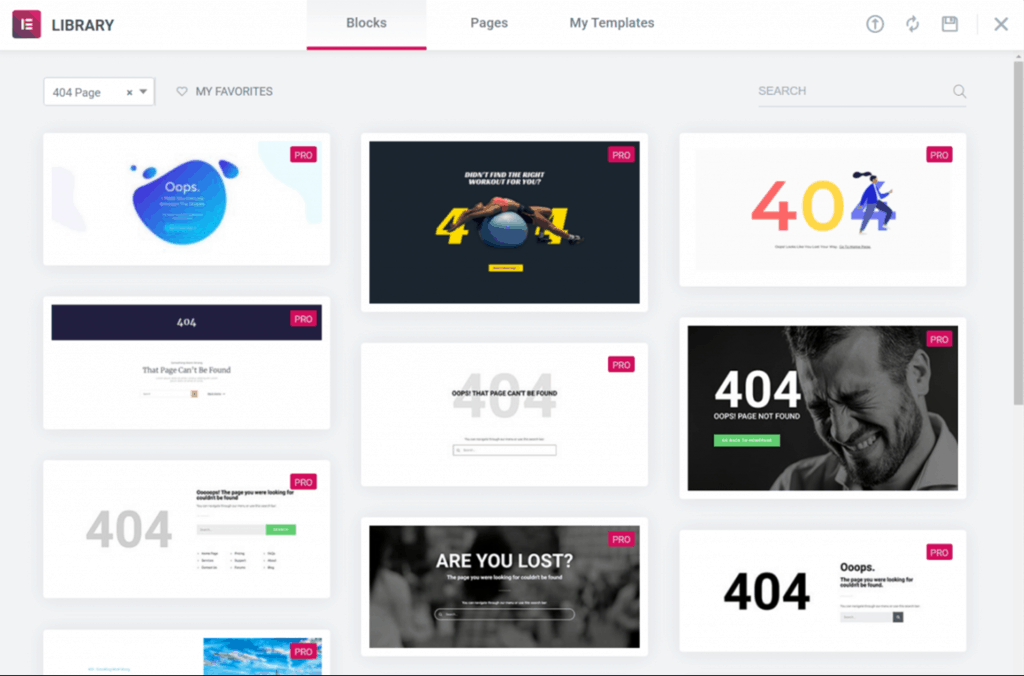
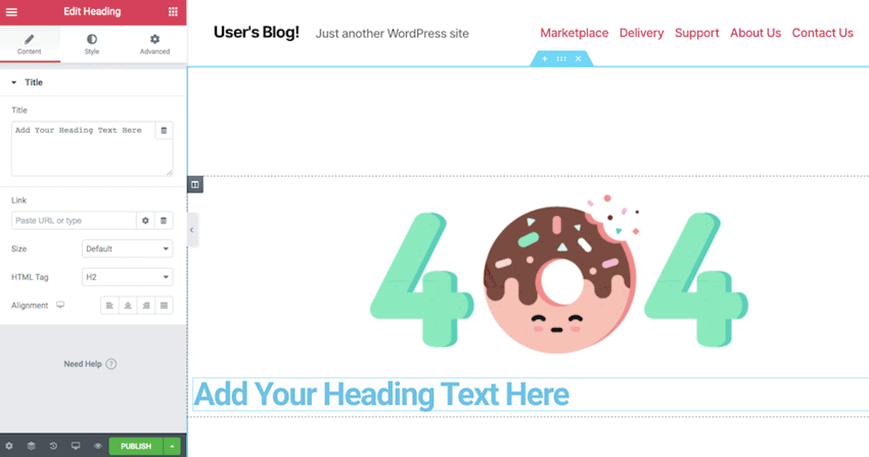
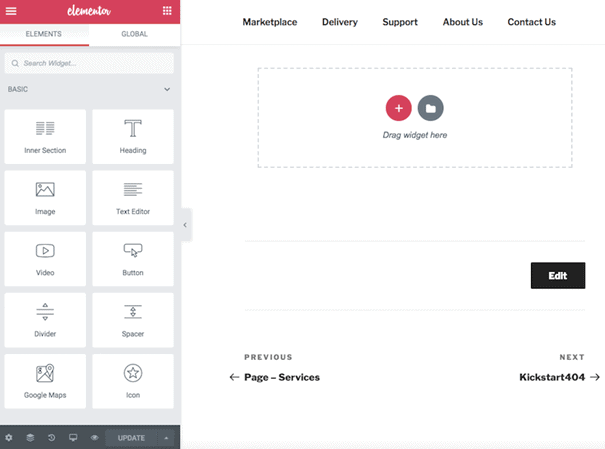
With Elementor’s simple drag and drop user interface, you can add anything you want to your 404 pages. Below, you will see a picture of the editor, so you know what to look for and what the entire thing looks like.
Now, let’s start talking about designing a 404 page from scratch. In case you don’t exactly know how to navigate a page builder, don’t worry about it at all; this article will guide you every step of the way. The first thing you will have to choose from is the number of columns your 404 will have. You can choose one of the many types that Elementor offers. After you do that, you can customize the position, the size, and the color of the column with the editor on your left.
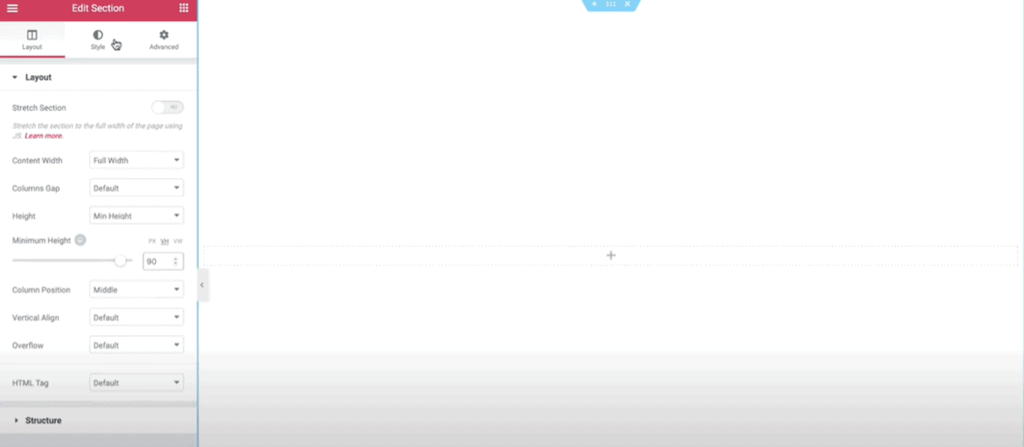
Once you’ve completed the first step, you can add different sections to your 404 pages. There are many various options for this on the left of the menu. Simply choose one and adjust it according to your needs and preferences.
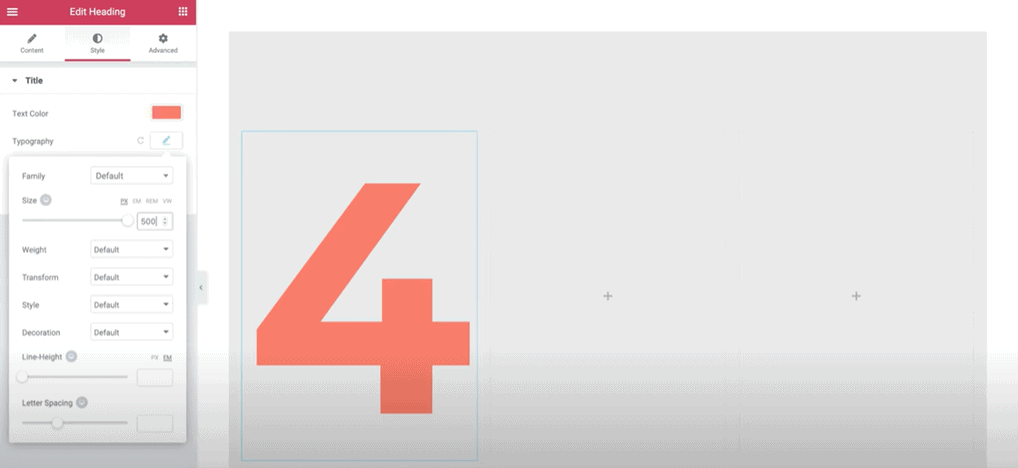
In this example, we are using the inner section and splitting it into three columns. After that, we are using the header option to write down the numbers 404 in them. Later on, you can adjust the size, the color, and the font of the numbers you wrote in them. You need to know that the font size only goes up to 200, but you can type in a bigger number than that if you really want to make a point.
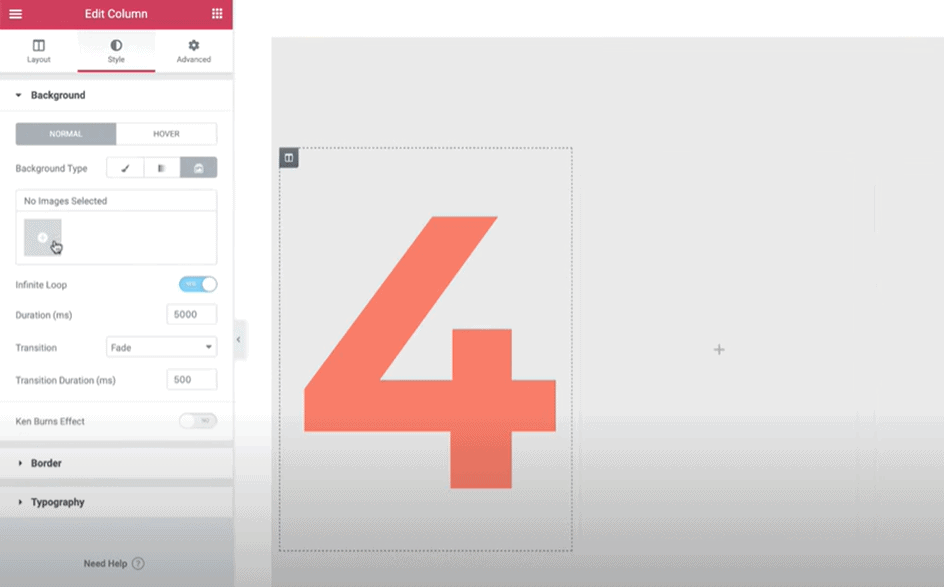
To enter the column settings, you need to find a small square in the top left corner and click on it to open the column. Once you’ve clicked on it, you need to go into the column’s style section and change the slideshow’s background type. After that, you can add images that will be incorporated into the 404 page and make it more alive, which is exactly what we will do.
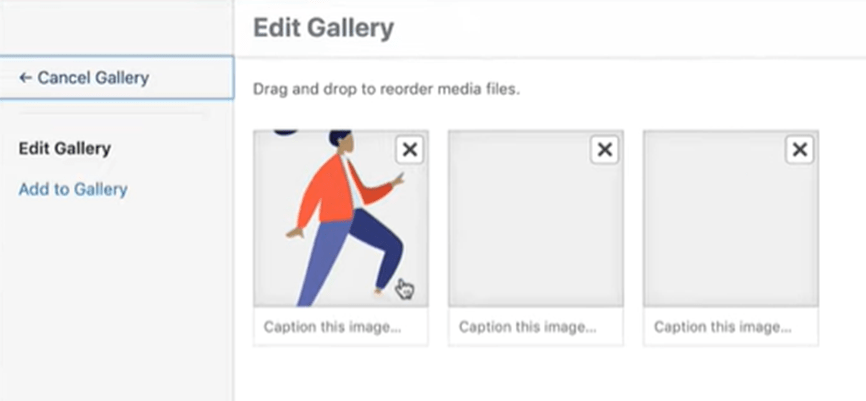
Clicking on the “Add Image” option and choosing the image you need has never been easier. Be aware; if you want to do it with three columns like we are doing in this tutorial, you need to select two empty .pngs with the same size so the picture can seem like it’s moving.
When doing this, you also need to be mindful of the image’s position and the empty .pngs. If you are putting a picture in the left column, the picture needs to be on the left and the empty .pngs on the right and in the middle. The same goes for any other column with a number in it. If the number is in the middle, for example, the picture needs to be in the middle and the two empty ones around it.
After you have done that, there is an „Insert Gallery“ button in the bottom right corner that you need to click on for the gallery to be inserted. The same process can be repeated for the rest of the galleries you want to put on the 404 pages.
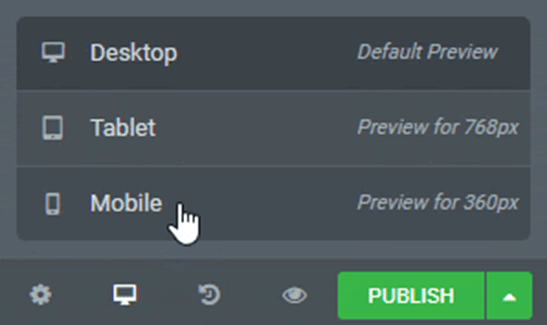
By clicking on the Viewpoint Device icon, you can open different previews for your 404 pages to make them fully responsive. If you want your 404 pages to look great on all platforms, you just have to click on the icon and choose the type of screen it’s going to be displayed on.
When you choose the mobile, tablet, or desktop viewpoint, you will get separate editors for all of them so you can achieve complete customization according to the device. Change everything, from font styles and sizes, headers and footers to animations, and everything else.
If you just want to edit the existing site, you can do that by going to the „Edit Column“ option and changing the column width to 33 percent. When that’s done, you need to edit the column in the top left corner by changing the alignment on the vertical and horizontal align buttons. To change your font size, you just go to the style editor and change the size to 145; that’s the right size for a mobile display.
Some other buttons you can see in the editor’s main menu are great because there’s so much you can do with your 404 pages. First, you can post a featured image on a gallery that will be included on your 404 pages. This is great because you can advertise your brand even on pages that are not so „important.”
To show your website is doing great, you can add comments to your 404 pages, where your audience can leave reviews and comments. For better representation, you can add an author box where you can put information about yourself and your brand so that your audience can get a better idea of what you’re all about.
By adding a table of contents, you provide a better overview of what else can be found on your website (when you actually go there). The viewer is more likely to try and visit your site if they know what to expect. There’s even an option to post navigation buttons on your 404 to get your audience to check out other working parts of your website. This is a great addition because your users would rather click on a button to go back to where they came from than reloading the website.
You can also add plenty of widgets from the basic version of the Elementor editor that are convenient when creating a 404 website because they really help make a good impression. By putting in a video essay and an icon representing your brand, you can give the viewer an introspective look into your company. Why not add a WP affiliate plugin code into your 404 page? That could work just fine in some cases. If you happen to add headers and images, you can make your website look more sleek and polished. By doing any or possibly all of the steps mentioned above, you will show your users that you care about the little things, such as a 404 website.
If your brand or business has a physical location (see how to get an llc in illinois), you can even add your Google Maps location, so your customers can come and see you in person. There are so many more widgets to use just in the basic editor, let alone the pro version. It is amazing how many options there are when it comes to editing your 404 websites with Elementor.
Conclusion
Elementor has proven to be one of the best page builders out there, especially when it comes to 404 pages. You can make them look polished and useful instead of having the dull white ones that will just frustrate your users. With so many options, types of editors, and widgets, you can make a very informative and aesthetically pleasing 404 websites that will improve user experience, even in these troubling times. By adding links and navigators, you can help the person that ended up on the 404 websites and navigate them back to the working parts.
The entire editor is easy to use because of its drag and drop user interface; you just put everything in place and get a real-time preview of where it will appear on the actual website. All of these options are included with the basic version of Elementor; the Pro version you can get a subscription to has even more. There are quite a few plans depending on how many websites you have, and you can choose which one fits the best. Elementor is a great page builder, and it will make your 404’s excellent with such ease, and you are going to love it.