



A REDTIGER 4K dash cam front rear setup can stop working in a few different ways. Maybe the front camera turns on but the rear camera shows no signal. Maybe both cameras stay black. Or maybe the screen looks fine, but the front and rear videos are not saving on the memory card.
That is why the first step is not to panic and replace the camera right away. A dual dash cam depends on power, the rear camera cable, the microSD card, the screen settings and sometimes the hardwire kit too. If one small part is loose or not set right, the whole setup can look broken.
This guide walks through the common fixes for a REDTIGER 4K dash cam front rear not working. Start from the simple checks first, then move to cable, card, reset, firmware and hardwire checks.
Quick Answer: Why Your REDTIGER Front or Rear Dash Cam Is Not Working
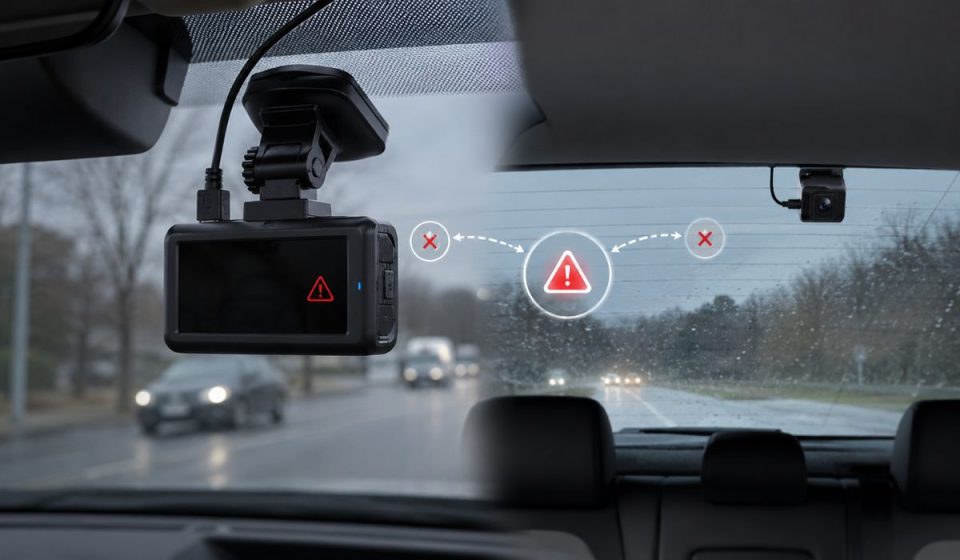
Your REDTIGER front or rear dash cam may not work because of a loose rear camera cable, weak power supply, bad microSD card, screen saver setting, wrong display mode, firmware issue, or hardwire kit problem. For rear camera issues, the cable and connection order are usually the first things to check.
First Identify What Is Not Working
Before you start changing settings, check what the dash cam is doing. This makes troubleshooting much easier because “not working” can mean many things.
| Symptom | Likely Cause | First Thing to Try |
|---|---|---|
| Dash cam does not turn on | Power cable, charger, 12V socket, hardwire kit | Test with the original REDTIGER charger |
| Front camera works but rear camera does not | Loose rear cable, bad rear camera connection, damaged cable | Reseat the rear camera cable |
| Rear view shows black screen or no signal | Rear camera not detected, cable issue, display mode | Power off, connect rear camera, power on again |
| Camera turns on but does not record | microSD card issue, storage full, card not formatted | Remove and format the SD card |
| Screen goes black but camera may still record | Screen saver, display timeout, lock screen mode | Change display or screen saver settings |
| Records front only | Rear camera cable issue or separate rear video folder | Check rear cable and saved file folders |
| Turns off while parked | Hardwire kit, parking mode, low voltage protection | Test with normal car charger first |
This table does not fix the issue by itself, but it tells you where to begin. If your dash cam has no power, do not start with firmware. If only the rear view is missing, do not blame the microSD card first.
Why Does a REDTIGER 4K Dash Cam Front Rear Stop Working?
A front and rear dash cam needs a few things to work at the same time. The front unit needs steady power. The rear camera needs a good cable connection. The microSD card needs to write video files properly. And the camera settings need to show or record the view you want. So when one of these parts fails, the issue may look bigger than it really is.
Common causes include:
- Loose rear camera cable
- Rear camera connected after the dash cam already powered on
- Weak or wrong power adapter
- Faulty 12V car socket
- Bad microSD card
- Card not formatted inside the dash cam
- Locked emergency files filling storage
- Screen saver or display mode hiding the view
- Damaged rear camera cable after installation
- Hardwire kit fuse or ground issue
- Parking mode or low voltage cut-off
- Firmware problem
- Faulty rear camera, cable, or front unit
In REDTIGER’s own F7NP manual, the first-time setup warning says to connect all cameras and wires before powering on the camera screen, or the camera may not work properly. It also recommends doing a bench test before final installation.
How to Fix REDTIGER 4K Dash Cam Front Rear Not Working?
Work through the fixes in order. Start with restart, cable, power and SD card checks before you reset the camera or update firmware. These simple checks solve many front and rear dash cam problems.
Also test after each fix. If you change the rear cable, SD card, power cable and settings all at once, you may not know which one fixed it. That makes the same issue harder to solve next time.
1. Restart the Dash Cam and Remove Power Fully
Start by turning the dash cam off fully. Do not only press a button and assume it restarted. Unplug the car charger from the 12V socket, disconnect the power cable from the dash cam, and let the unit sit for a short time.
If your rear camera is connected, leave it connected properly while you power the unit back on. A frozen screen or stuck recording state can clear after a full restart. This is not a deep repair, but it is a clean starting point before you check the cable and memory card.
For a hardwired camera, you may need to turn the vehicle off and wait, or test the dash cam using the normal car charger instead. That helps you separate a dash cam issue from a hardwire kit issue.
2. Reseat the Rear Camera Cable Properly
If the front camera works but the rear camera does not, check the rear camera cable first. The rear camera depends on a tight connection between the front unit and the rear camera. A plug that is slightly loose can give you a black rear view, no signal message, or no rear recording.
Power the dash cam off before you reseat the cable. Unplug the rear camera cable from the front unit, check the plug, then push it back in firmly. Do the same at the rear camera side if your model has a removable rear camera plug.
Check these points carefully:
- Make sure the rear cable is pushed fully into the front unit
- Look for bent pins inside the plug
- Check for broken plastic around the connector
- Make sure the cable is not hanging with tension
- Avoid forcing the plug if it does not fit smoothly
- Test the camera before hiding the cable again
This is a common issue after installation because the rear cable is usually routed through trim, headliner, or trunk areas. One pull or bend can loosen it just enough to stop the rear camera.
3. Connect the Rear Camera Before Powering On
Some REDTIGER setups may not detect the rear camera correctly if you plug it in after the front unit is already on. So do this simple test: turn the dash cam off, connect the rear camera cable fully, then power the dash cam back on.
This matters more during first-time installation. The REDTIGER F7NP manual says to connect all cameras and wires before powering on the camera screen. So if you plugged the rear camera in while the screen was already on, restart the whole setup and test again.
Do not overthink this step. It is just a clean detection test. Rear camera connected first, then power.
4. Test With the Original REDTIGER Car Charger
Dash cams need steady power. A random USB cable or weak adapter may turn the screen on for a second, but it may not keep the camera stable. You may see boot loops, black screen, recording failure, or the camera shutting off while driving.
Use the original REDTIGER car charger if you still have it. REDTIGER’s F7NP FAQ also tells users to use the original car charger when checking a camera that does not turn on. It suggests resetting the dash cam and reinstalling the memory card, rear camera cable and car charger during troubleshooting.
Try this power test:
- Remove the hardwire kit if you are using one and test with the normal car charger.
- Plug the charger into a working 12V socket.
- Test another 12V socket in the same vehicle if available.
- Test in another vehicle if you can.
- Check if the camera turns on without the rear camera and SD card attached.
If it works in another socket or another car, the dash cam may be fine. The issue may be your vehicle outlet, fuse, hardwire kit, or power cable.
5. Remove the microSD Card and Start the Dash Cam Again
A bad microSD card can make a dash cam freeze, restart, stop recording, or act strange. Sometimes the front and rear cameras are fine, but the camera struggles because it cannot write video files properly.
Turn off the dash cam, remove the microSD card, then power the dash cam on again. If the camera starts normally without the card, the card may be corrupted, too slow, full, or not formatted correctly.
This does not mean the card is always dead. It may just need formatting inside the dash cam. But if the camera only works when the card is removed, you have found a strong clue.
6. Format the SD Card Inside the Dash Cam
Formatting the SD card inside the dash cam is often better than only deleting files on a computer. Dash cams record constantly, so the card gets heavy use. Old files, locked emergency clips, or corrupted file structure can stop normal recording.
Before formatting, save any important videos. Formatting will erase the card. After that, open the camera settings and use the built-in format option if your model has it. REDTIGER’s SD card guide says some REDTIGER dash cams let you format the card directly inside the camera, and this helps the card work better with dash cam software.
If your REDTIGER shows “Card Error” or asks you to format the memory card, the F7NP manual suggests checking the format reminder, formatting the memory card, restoring factory settings and updating firmware if needed.
A good habit is to format the card regularly, especially if you drive a lot. Also use a high-endurance card made for dash cams. Normal cards can wear out faster under constant loop recording.
7. Check If the Front and Rear Videos Are Saved in Different Folders
Sometimes the rear camera is working, but the video is not where you expected. Some dual dash cams save front and rear files separately. The app gallery or SD card folder may show front files in one place and rear files in another.
Remove the SD card and check it on a computer, or use the REDTIGER app if your model supports Wi-Fi playback. Look for separate front and rear video files. The names and folders can vary by model, so do not assume the rear camera failed only because you do not see the file beside the front video right away.
This section is important when the rear view shows on the screen, but you cannot find the rear recording later. If live rear view works, your cable and rear camera are probably working. Then the issue is more likely storage, file location, or playback.
8. Turn Off Screen Saver or Change Display View
A black screen does not always mean the dash cam is off. Many dash cams have screen saver, display off, or lock screen modes. The camera may still record while the screen looks blank.
Check these settings:
- Screen saver
- Display timeout
- Front only view
- Rear only view
- Front and rear split screen
- Lock screen mode
- Mirror or rear view flip settings
Some REDTIGER manuals show display modes like front and rear view, front only, rear only, lock screen and screen display off. So if the screen looks blank, press the correct display or menu button and check whether the camera is simply hiding the view.
A simple test is to record for one minute, then check the SD card. If the video exists, the camera was recording even if the screen was off.
9. Check the Rear Camera Lens, Mounting Place and Water Damage
If the rear camera is detected but the image looks black, blurry, foggy, or too dark, check the lens and mounting position. A dirty lens, window tint, bad angle, or poor night lighting can make the rear view look worse than expected.
Also check where you mounted the rear camera. Some rear cameras are made for outside mounting near the license plate. Some are better mounted inside the rear windshield. This can vary by model, so check your exact REDTIGER manual before mounting the rear camera outside.
If water gets into a rear camera that is not meant for that type of mounting, the image may fail or become cloudy. Do not assume every REDTIGER rear camera has the same waterproof rating. Model details matter here.
10. Inspect the Rear Camera Cable for Damage
Rear camera cables often get routed through tight spaces. They may pass under trim, around the roof liner, through the trunk area, or near a hatch hinge. If the cable gets pinched, bent hard, or pulled during installation, the rear camera can stop working.
Look at the cable path. Pay special attention to areas where the cable moves when the trunk or hatch opens. Also check any place where trim was pushed back into place over the cable.
Inspect for:
- Pinched cable near doors or trunk
- Sharp bends near the connector
- Loose plug at the front unit
- Bent metal pin inside the connector
- Cable stretched too tightly
- Damage near the rear camera body
- Cable squeezed under plastic trim
If possible, remove the hidden routing and test the rear camera with the cable loose. This is not pretty, but it tells you if the installation path caused the problem.
11. Check Hardwire Kit, Fuse and Parking Mode Setup
If your REDTIGER dash cam stopped working after hardwire installation, test the camera with the regular car charger first. This is the cleanest way to know if the dash cam itself works. If it works with the charger but not with the hardwire kit, the issue is probably the fuse, ground, voltage setting, or parking mode wiring.
A hardwire kit usually depends on the right fuse slot and a good ground point. Some setups use an ACC fuse for power when the car is on, and constant power for parking mode. If these are mixed up or the ground is weak, the dash cam may turn off, restart, or fail to enter parking mode correctly.
Low voltage protection can also shut the camera down. That feature is meant to protect the car battery. So if your camera works while driving but shuts off while parked, it may not be broken. The hardwire kit may be cutting power because the voltage dropped below its setting.
Do not keep guessing with vehicle wiring if you are not comfortable. Test with the original charger, check the fuse tap, check ground, and then consider asking an installer.
12. Reset the REDTIGER Dash Cam
If the dash cam freezes, settings act strange, or the screen does not respond, reset it. Many REDTIGER models have a small reset hole. You can usually press it gently with a paper clip or pin, but check your exact model layout first.
REDTIGER’s F7NP FAQ says to press the reset button on the bottom of the dash cam with the tip of a pen or paper clip if the camera does not turn on after troubleshooting.
A simple reset may restart the device without erasing everything. A factory reset from the settings menu may remove custom settings. Before you format the card or reset settings, save any video you care about. It’s easy to forget that part when you are annoyed.
13. Update the Firmware for Your Exact REDTIGER Model
Firmware can fix bugs, but it should not be the first fix you try. Check power, cable, SD card and reset first. If the problem still stays, then look for firmware made for your exact REDTIGER model.
This part needs care. Do not install firmware from a different model just because the camera looks similar. A REDTIGER F7NP, F7N, F7NS, F9 or another model may use different firmware. Using the wrong file can create a worse problem.
When updating firmware, follow the official instructions for your model. Keep the camera powered during the process. Do not unplug it halfway through. If you are not sure which file is correct, contact REDTIGER support with your model number before doing anything.
14. Bench Test the Front and Rear Camera Outside the Car
A bench test means testing the camera before final installation, or outside the hidden wiring path. This helps you find out if the problem is the dash cam or the way it was installed in the car.
Do the test in a simple order:
- Place the front camera somewhere safe inside the car.
- Connect the rear camera cable directly without hiding it in trim.
- Insert a formatted microSD card.
- Use the original REDTIGER car charger.
- Power on the dash cam after all cameras and wires are connected.
- Check front and rear live view.
- Record a short clip.
- Check if both front and rear files are saved.
This test is very useful for new installations. If the camera works during the bench test but fails after you route the wire, the cable path or installation is likely causing the issue.
15. Contact REDTIGER Support or Replace the Faulty Part
If you checked power, rear cable, SD card, screen settings, reset, firmware and hardwire setup, then the issue may be hardware. The faulty part could be the rear camera, rear camera cable, power adapter, or the front dash cam unit.
Before contacting support, prepare the details. This makes the support process easier and avoids long back-and-forth messages.
Have these ready:
- Exact REDTIGER model number
- Order number or purchase proof
- microSD card brand and size
- Short video showing the issue
- Photo of the rear camera plug
- Photo of the power setup
- Note whether you use car charger or hardwire kit
- Clear symptom: no power, no rear view, no recording, black screen, or no signal
Do not assume warranty approval, because that depends on your purchase and product condition. But if the rear cable or camera is faulty, support can tell you the next step.
How to Avoid REDTIGER Front Rear Dash Cam Problems/
The best way to avoid dash cam problems is to test before final installation. Connect the front camera, rear camera, power cable and SD card first. Make sure front and rear video records before you hide wires behind panels. It saves a lot of time.
A few simple habits help:
- Use the original power cable when testing
- Format the SD card inside the dash cam
- Use a high-endurance microSD card
- Connect the rear camera before powering on
- Do a bench test before hiding cables
- Avoid pinching the rear camera cable
- Keep the lens clean
- Check front and rear recordings after installation
- Save important videos before formatting
- Check firmware only for your exact model
Dash cams are not hard to use, but front and rear setups have more parts than a single camera. More parts means more chances for one small thing to slip.
Final Thoughts
When a REDTIGER 4K dash cam front rear does not work, start with the simple stuff. Check the rear camera cable, original charger, SD card, screen mode and power setup before you assume the camera is dead.
Most problems come from connection, power, storage, or installation. If those are fine and the camera still does not work, reset it, check firmware for your exact model, then contact REDTIGER support.
Which issue are you seeing right now: no power, no rear camera view, black screen, or front and rear not recording?