



Python NeoPixel problems can be annoying because sometimes nothing looks “broken.” Your code runs. The terminal shows no red error. The script finishes like normal. But the LED strip stays dark, frozen, or just does nothing.
That usually means Python is not crashing, but the NeoPixel strip is not getting the right signal, power, or update command. So the problem can be in your code, your GPIO pin, your wiring, your power supply, or the board you are using.
This guide will help you check the most common reasons why Python NeoPixel is not working without giving error. We’ll go from simple code checks to wiring and power issues, then a few Raspberry Pi and CircuitPython-specific things.
Why does Python NeoPixel not work without giving an error?
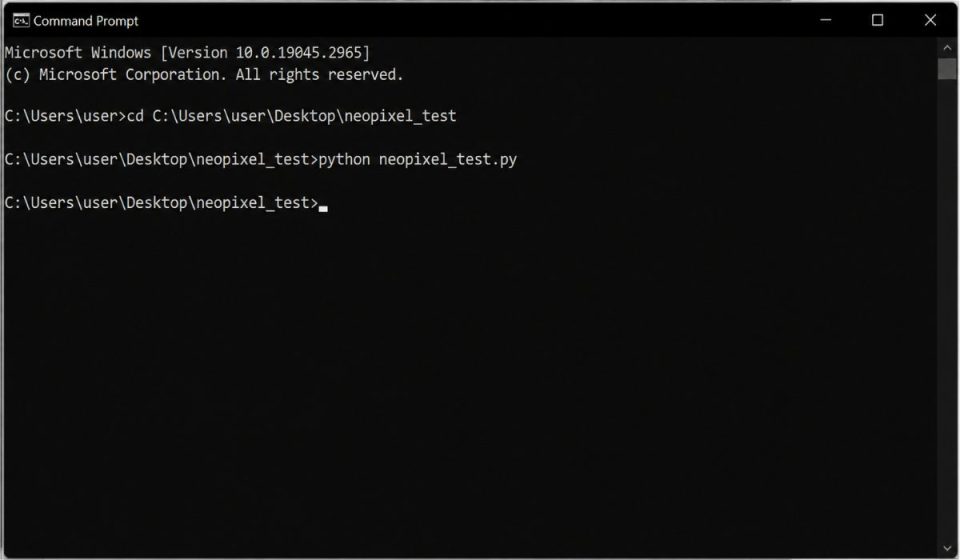
A NeoPixel strip can fail silently because the Python script only knows that it sent instructions. It does not always know if the LED strip received them, understood them, or had enough power to show them. So you may not get a Python error even when the data wire is on the wrong pin, the ground is missing, the strip is connected backward, or the LEDs need more power than your board can give.
Common causes include:
- The wrong GPIO or board pin is used in the code
- The data wire is connected to DOUT instead of DIN
- The board and LED power supply do not share ground
- pixels.show() is missing when auto_write=False
- The NeoPixel strip does not have enough 5V power
- The LED count in the code is wrong
- RGB, GRB, or GRBW color order is not set correctly
- The wrong NeoPixel library or Python environment is being used
- Raspberry Pi timing, PWM, DMA, or pin support is not set up right
That sounds like a lot, but don’t worry. Most silent NeoPixel issues come from only a few things: pin, power, ground, data direction, or show().
How to Fix Python NeoPixel Not Working Without Error?
Start with the easy checks first. Don’t jump straight into reinstalling everything or replacing the strip. Many NeoPixel problems are caused by one loose wire or one small code setting.
The best way is simple: test one small thing, run the code again, then move to the next fix. If you change five things at once, you may fix the problem but still not know what caused it. That gets messy later.
1. Power Cycle the Board and NeoPixel Strip
Before changing your code, fully restart the board and the LED strip. This sounds too simple, but it helps more often than people expect. NeoPixels can hold their last color or stay in a strange state after a script stops, especially if you were testing animations or stopping the program many times.
Unplug the board from USB, remove power from the LED strip if it uses external power, wait a few seconds, then connect everything again. If your strip was frozen, this gives it a clean start. It may not solve the main problem, but it removes one annoying thing from the test.
2. Run a Very Small NeoPixel Test Script
If your real code has animations, loops, buttons, sensors, or web controls, pause that for now. Use the smallest NeoPixel test you can. The goal is not to make a nice lighting effect. The goal is to see if the strip responds at all.
For CircuitPython-style code, a small test may look like this:
import board
import neopixel
import timepixels = neopixel.NeoPixel(board.D18, 8, brightness=0.2, auto_write=False)
pixels.fill((255, 0, 0))
pixels.show()time.sleep(2)
pixels.fill((0, 0, 0))
pixels.show()
Change board.D18 and 8 to match your board pin and LED count. If this basic test does not light anything, the issue is probably not your big animation code. It is more likely pin setup, wiring, power, library setup, or board support.
A simple red test is also easier to debug than rainbow effects. If the strip shows the wrong color, that points to color order. If it shows nothing, keep going.
3. Check If pixels.show() Is Missing
This is one of the easiest code mistakes to miss. If you set auto_write=False, the NeoPixel values can change in Python memory, but the LEDs may not update until you call pixels.show(). The official CircuitPython NeoPixel docs show this pattern, where changes are sent after show() is called.
So this code may not show anything right away:
pixels = neopixel.NeoPixel(board.D18, 8, auto_write=False)
pixels.fill((255, 0, 0))
But this version sends the update:
pixels = neopixel.NeoPixel(board.D18, 8, auto_write=False)
pixels.fill((255, 0, 0))
pixels.show()
If you use auto_write=True, the LEDs update when you set them. That can be fine for small projects. For bigger strips or smoother animations, people often use auto_write=False, but then they forget show(). Small mistake, big confusion.
4. Confirm the Correct GPIO Pin or Board Pin Name
Your Python code must use the same pin where the NeoPixel data wire is connected. This sounds obvious, but it is a very common silent failure. Python can run with a valid pin object, while your strip is wired to a totally different physical pin.
Check these things slowly:
- The data wire from the strip is connected to the same pin used in the code
- You are using the correct board name, like board.D18, board.GP0, or another valid pin
- You are not mixing physical pin numbers with GPIO numbers
- Your board supports NeoPixel output on that pin
- Your breadboard row is really connected where you think it is
This matters a lot on Raspberry Pi because people often confuse physical pin 12 with GPIO18. On Raspberry Pi Pico, you may use names like board.GP0 or machine.Pin(0) depending on CircuitPython or MicroPython. Same board, different code style. Weird at first, but normal.
5. Make Sure the Data Wire Goes to DIN, Not DOUT
NeoPixel strips have a direction. The data signal goes into the first LED through DIN, then moves through the strip. If you connect your board’s data wire to DOUT, the strip may stay dark even though your Python code runs fine.
Look closely at the strip. Many strips have small arrows printed on them. The arrow shows the direction of the signal. Your microcontroller or Raspberry Pi data pin should connect to the input side, not the output side.
This is one of those mistakes that feels silly after you find it. But it happens all the time, especially with cut strips, rings, and strips where the labels are tiny.
6. Connect the Grounds Together
If your NeoPixel strip uses an external 5V power supply, the board and the strip must share ground. Without a common ground, the data signal has no shared reference. The code can run perfectly, but the LEDs may not understand the signal.
A simple way to think about it: the board sends data, but the strip needs a “same ground” point to read that data correctly. So connect the board GND to the LED strip GND. If you use an external power supply, its negative side should also connect to that same ground line.
Do not connect only 5V and data and forget ground. That is a classic silent NeoPixel problem. Also be careful with power wiring. Connect things properly and avoid shorting 5V to ground.
7. Use Enough 5V Power for the NeoPixel Strip
A few NeoPixels may work from a board’s 5V or USB power, but a longer strip can need more current. If the strip does not get enough power, it may stay off, flicker, reset, show random colors, or only light the first few LEDs.
Try lowering the brightness and testing fewer LEDs first. For example, set brightness to 0.1 or 0.2 and test only 1 to 8 pixels. If that works but the full strip fails, power is likely part of the problem.
For bigger LED strips, use a proper 5V external supply made for the number of LEDs you have. Also keep the ground shared with the board. Adafruit’s NeoPixel power guide also recommends good power practices like adding a resistor on the data line and connecting ground before other connections.
8. Lower Brightness and Test Only One or Few Pixels
Sometimes the setup is close to working, but the first test is too heavy. Full brightness on many LEDs pulls much more power than a small red test. So if your code starts by turning the whole strip bright white, that can cause trouble.
Try a lighter test:
pixels = neopixel.NeoPixel(board.D18, 3, brightness=0.1, auto_write=False)
pixels[0] = (255, 0, 0)
pixels.show()
This test does a few helpful things at once. It lowers power demand, checks the first pixel, and avoids a big animation loop. If one pixel works, slowly increase the LED count. If nothing works even with one pixel, go back to wiring, pin, ground, and library checks.
9. Check the Pixel Count in Your Code
The number in your NeoPixel object should match the number of LEDs you want to control. If your strip has 30 LEDs but your code says 8, only part of the strip will be used. If your code says too many, behavior can get confusing depending on the board and library.
For example:
pixels = neopixel.NeoPixel(board.D18, 30)
Here, 30 means the code expects 30 pixels. If you are using a ring, matrix, or cut strip, count the LEDs again. It’s easy to guess wrong, especially with small rings or strips hidden inside a project case.
Wrong pixel count may not always make the strip fully dark. But it can make testing confusing, so it is worth fixing early.
10. Check RGB, GRB, or GRBW Color Order
If your NeoPixel strip lights up but shows the wrong colors, the problem may be color order. Many WS2812B-style LEDs use GRB order instead of RGB. Some strips use RGBW or GRBW because they have a separate white LED channel.
This usually does not cause a fully dark strip. It mostly causes red to show as green, green to show as red, or white colors to look strange. Still, users sometimes think the strip is broken when the real issue is only the color order.
The NeoPixel API includes a pixel_order option, and the docs describe color order and brightness settings in the library. If your LEDs work but colors are wrong, test red, green, and blue one by one. Then set the correct order for your strip.
11. Reinstall or Match the Correct NeoPixel Library
If your wiring looks right and the strip still does not respond, check the library setup. This is extra important when you switch between CircuitPython, Raspberry Pi Python, Thonny, virtual environments, or different boards.
For Raspberry Pi Python, many users install a package in one environment, then run the script from another. The script may still open and run, but the NeoPixel code may not use the setup you expect. If you use a virtual environment, make sure you installed the NeoPixel package inside that same environment.
For CircuitPython boards, check the lib folder on the board. Make sure the right NeoPixel library file is there, along with needed dependencies. The Adafruit NeoPixel package is made for CircuitPython and works with Python through Blinka on supported computers with GPIO.
Things to check:
- Are you running the same Python where the library is installed?
- Did you install adafruit-circuitpython-neopixel in the right environment?
- Is the CircuitPython library bundle version close to your CircuitPython version?
- Is the file copied into the board’s lib folder if you use CircuitPython?
- Are you using old example code from another library?
Don’t reinstall random packages again and again. First confirm where your code is running.
12. Make Sure You Are Not Mixing CircuitPython and MicroPython Code
CircuitPython and MicroPython can look similar, but they are not the same. A CircuitPython example may use import board and board.GP0. A MicroPython example may use machine.Pin(0). If you mix them, the code may fail, or you may fix one error and still not control the LEDs correctly.
For example, CircuitPython style often looks like this:
import board
import neopixelpixels = neopixel.NeoPixel(board.GP0, 8)
MicroPython style can look more like this:
from machine import Pin
import neopixelpixels = neopixel.NeoPixel(Pin(0), 8)
So before you copy another example, check your board firmware. Are you running CircuitPython on a Pico? MicroPython on an ESP32? Python on a Raspberry Pi? The right code depends on that.
13. Check Raspberry Pi-Specific Pin and Timing Issues
Raspberry Pi NeoPixel setup can be more picky than a microcontroller setup. NeoPixels need very exact timing, and Raspberry Pi is a full computer running an operating system. That is why libraries often use hardware features like PWM and DMA to create a stable NeoPixel signal. The rpi_ws281x project notes that it uses Raspberry Pi PWM and DMA features to drive WS281X LEDs.
If you use Raspberry Pi, check the guide or library docs for supported pins. Some NeoPixel setups commonly use GPIO18 because of PWM support. If you randomly choose another pin, the code may not control the strip even if the pin looks valid in your script.
Also check if audio or another feature is using the same PWM hardware. This is not the first thing to blame, but it can happen. If your setup worked before and stopped after OS, audio, or library changes, this area is worth checking.
14. Add a Logic Level Shifter for 5V NeoPixel Strips
Many Raspberry Pi and ESP32 boards send a 3.3V data signal. Many NeoPixel strips are powered by 5V. Sometimes that 3.3V data signal works, especially with short wires and small tests. Sometimes it does not work reliably.
A logic level shifter changes the data signal from 3.3V to 5V. Adafruit’s NeoPixel best practices say 5V-powered NeoPixels ideally need a 5V data signal, and they mention level shifter chips like 74AHCT125 or 74HCT245 for 3.3V boards.
You don’t always need this for a tiny bench test, but it becomes more useful with longer strips, longer data wires, Raspberry Pi projects, ESP32 projects, or random flickering. If everything else looks right and the strip still ignores data, a level shifter can be the missing piece.
15. Test the First LED or Try Another Strip
The first LED matters a lot. If the first NeoPixel is damaged, the rest of the strip may not receive data. That can make the whole strip look dead even if power and code are fine.
Check the first LED area carefully. Look for bad solder joints, loose jumper wires, broken copper pads, or a cut strip that was soldered on the wrong side. If you have another small strip or ring, test that with the same board and code.
A quick hardware check can save a lot of time:
- Try a different data jumper wire
- Press gently on loose Dupont wires while testing
- Test a shorter strip section if your strip is cuttable
- Try another NeoPixel ring or strip if you have one
- Check that 5V and GND are not reversed
- Look for a burned or cracked first LED
If another strip works with the same code, your original strip or first pixel may be the problem.
What If NeoPixel Works Once Then Stops Updating?
If your NeoPixel strip lights once and then stops changing, check how your script ends. NeoPixels can keep their last color after the program stops. So it may look “stuck,” but the strip is only showing the last data it received.
Add a clear-off step at the end of your script during testing:
pixels.fill((0, 0, 0))pixels.show()
Also make sure your loop is still running if you expect animation. If the script finishes after one color, the LEDs will not keep changing by themselves. They only change when your board sends new data.
Quick Checklist Before You Change More Code
Use this checklist before you rewrite your whole project:
- Did you restart both the board and LED strip?
- Does a small red test work?
- Is pixels.show() included when auto_write=False?
- Is the data wire connected to the exact pin used in code?
- Is the data wire connected to DIN, not DOUT?
- Are all grounds connected together?
- Is the strip getting enough 5V power?
- Is brightness lowered for testing?
- Is the LED count correct?
- Are you using the right RGB, GRB, or GRBW order?
- Are you using the right library for CircuitPython, MicroPython, or Raspberry Pi Python?
- If using Raspberry Pi, are you using a supported pin and setup?
- Have you tested another jumper wire or another strip?
If you can answer yes to most of these, your setup should be much easier to debug.
How to Prevent Python NeoPixel Problems Next Time?
The best way to avoid NeoPixel problems is to build the project in small stages. Test one LED first, then a few LEDs, then the full strip. Keep a working test script saved somewhere, because that script becomes your “is the hardware okay?” test later.
A few habits help a lot:
- Label the data input side of your strip
- Write down the board pin you used
- Use low brightness while testing
- Keep the board ground and strip ground connected
- Use external 5V power for bigger strips
- Avoid long loose data wires when testing
- Keep the correct library bundle for your board
- Test red, green, and blue before building animations
- Save one simple working script before adding sensors or buttons
It’s not about being perfect. NeoPixel projects just have more small moving parts than normal LEDs. A little slow testing saves time.
Final Thoughts
When Python NeoPixel is not working without giving error, the problem is usually not a mysterious Python bug. Most of the time, the code runs but the LED strip does not receive a clean update. Check pixels.show(), the data pin, DIN direction, shared ground, power supply, and library setup before you replace parts.
Start small. One pixel, low brightness, one color. Once that works, build up from there. If your NeoPixel strip still stays off, comment with your board name, LED strip type, pin used, and whether you are using CircuitPython, MicroPython, or Raspberry Pi Python.